
Hey there, I’m Maeda.
This time, I took part in the UTMB Series’ Asia Major race, “Chiangmai Thailand by UTMB CHIANG DAO160.”
As an Asia Major race in the UTMB Series, it feels like it’s been drawing more attention year after year.
The biggest appeal of this race is, without a doubt, that you can earn double the Running Stones used for entry into the UTMB Final!!
To rack up Stones, some people do a combo like 20 km on Saturday and 50 km on Sunday, or I even heard there were runners who did 20 km the day after running a 100-miler…
A lot of runners are desperately trying to boost their odds through this “stone hunting.”
For me, this was my second time participating, following 2023—and I could really feel how the race has matured.
Back in 2023, the course was so brutal I swore to myself I’d never run it again (lol).
I came this time feeling a bit nervous, but the course surface and the markings had improved a lot!
For overseas races, there’s often limited information and plenty to feel anxious about, but I hope this article can provide even a little useful insight for anyone planning to join next year and beyond.
目次
Race Information
Since the detailed race info can change depending on the year, I’ll keep this as a high-level overview m(_ _)m
Also, please note that this write-up focuses on the 100-mile category I participated in.
・Date/Time: 2025/12/5 (Fri) 11:00 – 12/7 (Sun) 11:00
・Time limit: 48 hours
・Location: Chiang Mai, Thailand / Venue: Chiang Mai PAO PARK
・UTMB RUNNING STONES: 8 (as a Major race, you receive double the usual amount)
・Priority entry to the UTMB Final: Top 10 overall (men/women) and Top 3 in each age-category (I heard last year even 5th place received priority entry, but I never found confirmed information lol)
・Participants: 499 (377 finishers)
・Finish rate: 75%
I’ll go into more detail about the course and aid stations below, but first, here’s the big picture.
By the way, Shuto-san wrote a separate blog post about transportation and accommodation outside the race, so please check that out too♪
Course Information
Here I’ll talk about the course.
If I had to describe the whole thing up front, it would be:
“ONTAKE with steep, straight-up climbs mixed in.”
That’s how strong the forest-road impression was.
Of course the vegetation is different, but overall there are many runnable (or rather, “you’re made to run”) sections, with river crossings and technical trail segments sprinkled in between.
From here, I’ll break the entire course into three sections and explain key cautions and tips for each.
Section 1 (START–A5)
From the elevation profile, you can roughly tell which parts will take time and which parts are easier.
From here, I’ll pick out and introduce the sections where you need to be especially careful.
The A1–A2 segment has a steep climb and is also long, so there’s a risk of running out of water.
The temperature wasn’t that high on race day, so I went with 1L, but some people carried 2L.
I think most people will feel safer with around 1.5L.
Also, Thai trails are basically straight up and straight down. (Both ascents and descents.)
On top of that, the ground is rock-hard, compacted dirt, which really takes a toll on your legs.
Maybe it’s just me, but even the concrete felt harder than roads in Japan (lol).
The long descent toward A2 is on pavement, and the steepness is something you’d never see in Japan.
If you don’t want to destroy your knees and quads, I recommend holding back here.
Next is the A2–A3 segment.
This part is a long, gradual climb on forest roads, followed by a steep trail climb at the end.
The forest road is pure ONTAKE.
Red-soil ONTAKE.
In this exotic-feeling ONTAKE, Japanese runners nearby were literally saying to each other, “This is ONTAKE, isn’t it?”
Even if you can’t run it all, mixing in run-walk should translate into a big time gain here.
On the flip side, if you hike the entire thing, your time will deteriorate quickly in this section.
Climb steadily within a sustainable effort level!
After A3, there are spots with a jungle-like Southeast Asian vibe and some unstable footing, but overall I didn’t feel there were any particularly difficult sections.
That said, the course has strong contrasts: runnable parts and completely unrunnable parts tend to alternate.
Don’t rush—focus on moving carefully and steadily.
Section 2 (A5–A11)
Section 2 probably looks generally runnable overall.
That’s true—most of it is quite runnable, and there aren’t many truly difficult parts.
But if you’ve already lost the ability to run, it’s a different story: if you keep walking, the lack of variety can make you drowsy more easily in this section.
The key segment to watch out for is A5–A6.
Again, it’s a long gradual climb on forest roads, followed by a steep trail climb.
Since it takes time, I recommend carrying extra fuel and water.
When I ran it, most of this was at night, but there were places that would probably have amazing views during the day.
The majestic temples caught my eye even at night.
That said, honestly, I didn’t have the spare capacity to pull out my phone and take photos (lol).
Another note—not about technical difficulty, but the course connects villages, and there are dogs and livestock everywhere.
Dogs, in particular, bark at you pretty often, and they’re basically all off-leash.
If you’re running alone, some dogs will come right up to you barking, so if you’re not good with dogs, be mentally prepared.
On the other hand, some friendly dogs will mysteriously “guide” you from the front, so there are heartwarming moments too (lol).
Section 3 (A11–FINISH)
Section 3 is the final crux of the race.
By now you’re beyond 100 km, and you start seeing more and more runners fall apart.
The A12–A13 segment was sneakily tough.
It’s mostly downhill, but as mentioned earlier the ground is rock-hard, so the soles of my feet were in unbearable pain (lol).
There was nothing to do but endure—but if you can’t run the descents here, it takes far too long, so it’s important to save your legs up to this point.
And then, the core section.
The A13–A14–W4 part forces you to climb steeply at a stage when you can barely produce power, so if you’ve already spent your strength, this section can really eat up your time.
For me it was just after sunrise, so I didn’t feel the heat that much, but if you hit this section with the sun higher, you’ll probably need more water.
Planning for 1.5L–2L should be a safe guideline!
After W4, it’s basically all downhill, but as mentioned your feet will probably be screaming by then.
On top of that, the final descent is quite rocky and hard to run.
Most of the route up to that point is forest road or jeep track and easy to run downhill, so I can’t help but complain: why make us run something this difficult right at the end?
Even though it trends downhill, as you lose altitude the temperature rises, so it’s safer to carry extra fluids.
And because this descent is the final section for multiple categories, it tends to get congested.
I was descending while passing runners near the back of the 100 km race, and then I got passed by the top runner of the 50 km race at the end.
According to someone who finished the 100-mile in around 30 hours, they got stuck overlapping with the 50 km “volume zone” and couldn’t move forward smoothly.
The very end of a long journey—the joy of returning to the venue is something special!
A daytime finish looks great too, but at night it’s lit up and has a unique atmosphere, so I think you can capture some really nice shots♪
Aid Station Information
Next is aid station info.
The first thing I want to tell you is:
“There’s an aid station roughly every 10 km.”
That’s the key point.
Since it’s a race in Southeast Asia, you might worry about heatstroke or running out of water, but the short distance between aids is reassuring.
As for drop bags:
A5: at 52 km
A11: at 110 km
You can place separate drop bags at these two locations.
They’re spaced perfectly for swapping gear and restocking nutrition, so use them wisely.
So, what was available at the aid stations? Here’s what I saw:
SNACK
・Drinks (water, electrolyte drink, sweet drink, cola)
・Fruit (bananas, watermelon, mandarins)
・Dried fruit (variety unknown 🙇♂️)
・Sweets (local cream pies, snack chips, chocolate snacks, etc.)
・Jelly (flavor unknown)
・Light food (chikuwa, shrimp wontons? dumplings? etc.)
・Instant noodles
・Amino Vital (two types: amino acids and energy)
FOOD (basically SNACK + hot meals)
・Soup
・Noodles
・Tofu dishes
・Fish tofu (fish-paste nuggets?)
・Rice
・Stir-fries
…etc.
SNACK and FOOD aid stations come alternately, so you can think of it as getting something warm about once every 20 km.
Taste preferences vary, so I can’t say it fits everyone, but nothing tasted “inedible.”
Some items are heavily spiced, though, so if you’re worried about your stomach, I recommend tasting a bit before committing.
Also, there were places that offered FOOD-style items even when they weren’t technically FOOD aid stations, so I think the menu is decided fairly loosely (lol).
TIPS
・If you ask the aid staff, you can get ice—great for putting into a neck cooler, etc.
・For cola, it’s better to get the kind chilled with ice; the carbonation is slightly reduced, so it’s less likely to make you gassy
・You can also get ice for your bottles
・You can take as many Amino Vital gels as you want, so it’s fine to rely on them
Key Strategy Points
So far, I’ve covered the course and the aid stations.
If you’re running the same course, I’ll break down the key strategy points into three parts.
① Heat management
Even though it was relatively cool this time, the jump from winter in Japan to summer-like heat is still tough.
Starting 10 days before going to Thailand, I went to the sauna every other day—partly as a recovery strategy—to acclimate my body to sweating more easily.
At home, I also took long baths and did aerobic workouts indoors in a warm environment to prepare for hot conditions.
In addition, you absolutely need tricks to release body heat, like getting ice as mentioned earlier.
For gear, I used cooling arm sleeves and also wore a hat, among other things.
② Downhill management
The dirt is unbelievably hard—harder than anything I’ve experienced in Japan—and because the trail goes straight down rather than in switchbacks, your quads tend to get wrecked.
You need to mix in walking and find ways not to take the impact directly.
Early on, the downhills feel great and you can run comfortably, so it’s easy to overdo it.
Keep asking yourself whether you’re pushing too hard as you go!
Even if they could still climb, I saw many runners late in the race who couldn’t run the downhills at all.
If you can’t run the descents, your time explodes, so run with “life first” in mind!
③ River crossing management
Thai races have a ton of river crossings!
This time too, there were crossings from the early stages, and it seemed many runners ended up with waterlogged soles.
On top of that, the hard surface makes the pain build and build—a vicious cycle!
Frequent foot care is important, or better yet, prepare in advance: wear highly quick-drying socks, apply skin-protection cream, etc.
In my case, I used ramie socks and applied the skin-protection cream “Tengu Balm” in three rounds starting the night before.
As a result, I finished with no issues, but just in case, I carried a spare pair of socks in my pack.
I’ll introduce my gear in more detail below, so please check that section too.
Recommended Training
I’ve written this several times, but this race has a very strong “ONTAKE” element.
In other words, the training you need is mountain-pass running!
The ability to keep running steady climbs
Resilience to the landing impact on descents
Mountain-pass running is perfect for building those two qualities.
Of course, you also need power for steep climbs and downhill technique, but in terms of the most course-specific, high-return training, “mountain-pass running” is it.
I heard the course has something like nearly 100 km worth of this style, so training on sloped roads and forest roads should be especially effective.
If I were to suggest some specific key sessions:
20 km with D+800–1200 m
30 km with D+1200–1800 m
40 km with D+1600–2400 m
Those would be good benchmarks.
Find a place near your home where you can run mountain passes!
If possible, it’s even better if you can find a route with long continuous climbs and long continuous descents.
For pacing, a good guideline is about 60–80% effort on the climbs.
Get strong with mountain-pass running!
Gear / Equipment
I’ll introduce the gear I used this time.
First, I’ll share three items that were especially good.
① Headgear: INNER FACT Trail Hat
⏩ I chose a hat with plenty of shade for blocking sunlight.
✅ It was excellent because I could soak it with water and even put ice at the top of my head!
Just covering the back of the neck makes things feel much easier. A hat is perfect for hot races!!
② TENGUSALT (sodium intake / cramp prevention, electrolyte replenishment)
⏩ When you sweat, you lose electrolytes as well as water. In particular, when sodium drops, it often leads to performance decline and gastrointestinal issues, so I made a point to take it consciously.
Because of the heat, I took more than usual this time: 3 tablets before the start, then 2–3 tablets per hour. When I sweated heavily on steep climbs, taking 3 tablets helped me avoid trouble and keep fueling smoothly to the end.
This varies a lot by individual, so it’s best to decide your intake based on your sweat rate and other factors.
③ Arm sleeves: Goldwin Cooling Arm Cover with Palm
⏩ Since the forecast was for high temperatures, I wore these to reduce fatigue from sunburn and to get a cooling effect from evaporative cooling.
✅ They felt very cool! I wet them with water before the start, and after that I kept them wet by splashing water on them whenever possible. (They also get wet from sweat.)
The difference in fatigue with vs. without them is huge, so I recommend wearing them proactively as we head into warmer seasons! For reference, I’m 168 cm / 58 kg and wore size M.
Below, I’ll list the gear I used, including mandatory items.
・Headlamp: Fenix HM65R-T
⏩ I chose it after comparing: the front-mounted battery for easy swaps, switching between white/yellow light, battery life, and above all, brightness.
✅ A brighter light definitely lets you descend faster.
Of course, battery life decreases, so swapping is necessary, but based on timing I expected to be able to swap at aid stations, so I planned and prepared accordingly.
Battery performance was solid, and being able to micro-adjust fit with a dial like a BOA system was also a big plus.
It has three brightness modes: 1300 lumens (~4 hours) / 400 lumens (~12 hours) / 130 lumens (~24 hours).
I used 1300 lumens only for descents where visibility mattered.
For climbs and roads I used 130 lumens, and for runnable trail sections and descents I used 400 lumens.
This time I made it to the 10-hour mark without changing the battery.
This can vary with temperature, so you should definitely carry a spare battery, but another plus is that it uses the common 18650 battery, which is easy to obtain.
・Backup light: Fenix HM55R LED
⏩ Above all, it’s light! I chose it because it has sufficient brightness and runtime as a backup light.
✅ To shorten battery swap time, I used it for about two hours.
Descents were comfortable♪
・Pack: THE NORTH FACE Summit Run Race Day Vest 8
⏩ It’s 6L, but the front pockets hold a lot, so everything—including mandatory gear—fit inside.
✅ It didn’t bounce, it’s lightweight, and access was easy—overall very user-friendly with no quirks.
If I had to nitpick: being lightweight makes it easier to tear, and the snug fit can make soft flasks harder to insert.
・Sleeveless top: INNER FACT Ultralight Sleeveless
⏩ Since the forecast was that temperatures wouldn’t drop below 20°C, I chose it for coolness and to prevent overheating.
✅ I made it the whole race without changing. No chill from sweat, and I could keep running comfortably.
・Tights: INNER FACT 6-Pockets Running Tights [UNISEX]
⏩ I chose tights because they reduce muscle bounce and provide lots of storage pockets, which is convenient.
Depending on the situation, I could also stash a spare bottle.
✅ I stored nutrition around the waist and kept trash in the side pockets. Personally, I’m the type who wears underwear under tights (lol).
I recommend pairing them with the seamless inner pants listed below.
・Calf sleeves: Goldwin Compression Calf Sleeves
⏩ I know showing your calves looks cooler, but survival comes first (lol).
Like tights, I wore them to reduce muscle fatigue.
✅ They also helped prevent scrapes in falls, so I really felt the benefit. Since you pass through brushy areas at times, I think calf sleeves are worth wearing.
・Inner pants: INNER FACT Men’s Seamless Inner Pants (Mid Length +5cm)
⏩ I’ve used these for a long time with zero chafing, so they’re a trusted staple for me.
The image impact is intense, but the performance is the real deal (lol).
✅ Again this time: no issues. No chill, super comfortable!
・Socks: INNER FACT Ramie Five-Toe Mid Length (Ankle Length)
⏩ This is another item I trust completely for ultras. Blisters and chafing are truly minimal.
Results will vary, but I can confidently say this is the best footwear choice for me—from training through race day!
✅ There were lots of river crossings this time, but I finished with my soles intact without changing socks even once.
・Waist belt: INNER FACT Full Mesh Waist Belt
⏩ Light! And it doesn’t squeeze the stomach much, plus it can carry a variety of items, so I chose it.
I used it for things that get messy inside a pack: nutrition, supplements, spare batteries, soft flasks, etc.
✅ I could swap and grab fuel without stress.
・Rain jacket (upper): Teton Bros FEATHER RAIN JACKET (2023 model, different color)
⏩ It’s a bit thicker, so it’s about 15g heavier than my lightweight rain shell, but since I expected strong winds late in the race, I chose peace of mind over the thinnest option.
✅ I didn’t end up needing it, so I can’t say much, but I had no regrets about the choice.
・Taping: INNER FACT Stretch Tape (Folded Strip), 5cm x 5m
⏩ I’ve loved this since launch—its biggest advantage is how well it stays on.
I used it on my ankles, knees, hamstrings, lower back, and iliopsoas.
✅ Some parts peeled due to heavy sweating, but it didn’t come off completely.
This tape really does not peel! I recommend it with zero bias!
・Shoes: SALOMON S/LAB GENESIS
⏩ Last time in Chiang Mai, my memory was that it was very technical and beat me up, so I chose a shoe with good grip and easy footwork.
✅ Cushioning was good and I could run steep climbs without stress.
That said, because there were so many runnable sections, I felt a carbon-plated trail shoe might also have worked well.
・Soft flask: INNER FACT Soft Flask (Normal)
⏩ It stands on its own so aid-station work is easy, and refilling is stress-free—so I chose it with confidence.
✅ I fell at one point, but it didn’t tear and there was no leakage!
・My cup: INNER FACT Soft My Cup “Night Trail”
⏩ Light!! Cute design! Foldable and compact!
✅ I feel like I drank 2 liters of milk tea 😘
List of Fuel Used
I’ll list the fuel and supplement items I used during the race.
Since preference and stomach compatibility vary a lot, I recommend trying them once to see what works for you!
・ORE WA SHUSSU ENERGY Fuel Gel
⏩ It’s a smooth liquid type, and I felt it was easy to take even when my stomach was getting tired later in the race.
Personally I preferred the grape flavor, and combined with peach I took more than 20 gels.
I could feel power come back after taking it, and for races where speed matters, it’s an essential fuel for me.
・ORE WA SHUSSU RECOVERY Fuel Gel
⏩ In long races, the body tends to break down muscle for energy more and more, so I try to keep protein coming in continuously.
But eating chicken would take too long to digest, so I take it as amino acids and similar forms—and this time I used this gel.
It’s yuzu flavor with a bit of bitterness, so it was a nice change of pace without that cloying gel sweetness♪
・7-Eleven Warabi Mochi series
⏩ A classic convenience-store fuel! This time I chose the Uji matcha flavor with a slight bitterness to keep things refreshing.
It’s cheap and available everywhere, so I use it regularly even in everyday training.
・Oi Ena (concentrated liquid fuel to dilute)
⏩ Goes down smoothly, and above all it’s delicious!!
If it tastes good, you won’t get sick of drinking it. One bottle gives you 549 kcal, so it’s a great option to combine hydration and calorie intake♪
This time, at the start and at Hokuroku Park, I set one bottle as Oi Ena and headed out.
・TENGU GINGER (Gashin-san capsules)
For years, a well-known option for preventing GI trouble has been the herbal medicine called Gashin-san.
This product puts that Gashin-san into capsules. I’d been using Gashin-san for a while, but the powder is hard to take, and true to “good medicine tastes bitter,” it has a distinctive flavor (lol).
Sometimes you see people accidentally blow powder at aid stations—and it’s almost certainly Gashin-san (lol).
Putting it into capsules solves all of those problems!
This time I took 3 capsules before the race, 3 in the middle, and 2 in the late stage; maybe thanks to that, I finished without any trouble.
Pre-race Preparation Tips
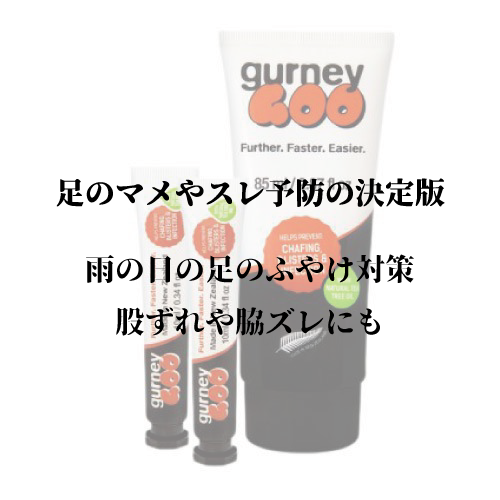
・Skin protection cream: TENGUBALM 100ml
⏩ Skin problems are part and parcel of ultra running. Using a skin protection cream helps prevent blisters and chafing.
Recommended application areas: soles, toes, groin/inner thighs, butt crack & anus (very important!), armpits, etc.
I recommend applying three times: the night before the race, while getting ready on race day, and right before the start.
Creating a protective film also makes you more resistant to waterlogging in rain and similar conditions.
Unlike Vaseline, it’s not sticky, and you can still apply tape over it—those are big advantages♪
・Massage lotion: TENGULOTION
⏩ A lotion that helps reduce fatigue and feelings of sluggishness!
It worked so well I almost worried there was something “dangerous” in it (lol).
A similar product would be PR Lotion.
In the same way, I used it 30 minutes before the race, and during the race on areas where fatigue started to build.
It’s also useful for recovery, so I rely on it in day-to-day training too♪
That’s all!
Thank you very much for reading to the end!
I hope this article can help someone, somewhere, even just a little.
I’ll also leave my article about the 2023 edition here, so please check it out if you’d like♪
コメント